
T95E6 guide: stats, equipment, crew, and how to play it
The XT95E6 shows up as a campaign carrot for teams that grind Global Map events. It is not a tech-tree comfort pick — it is a 120 mm DPM machine with a turret you can work, a hull you cannot, and enough gas to rotate when the minimap opens up.
This guide walks through encyclopedia-top module numbers (WG API, no equipment or field mods), a sensible equipment stack, crew order for a four-person crew (commander doubles as radioman), and the playstyle loop that keeps you alive.
Chasing the reward? Our Maneuvers and clan event catalog lists coaching and account-safe boosts when your roster needs backup.
Note: Numbers below come from the top configuration in the in-game encyclopedia. Shell rows use WG’s average damage and penetration values from the min/avg/max bands. Patches can nudge soft stats — double-check the client before you bond-load the tank.
On this page
- Key specifications
- Firepower
- Survivability
- Mobility and vision
- Equipment
- Crew skills
- Consumables
- Playstyle and verdict
Key specifications
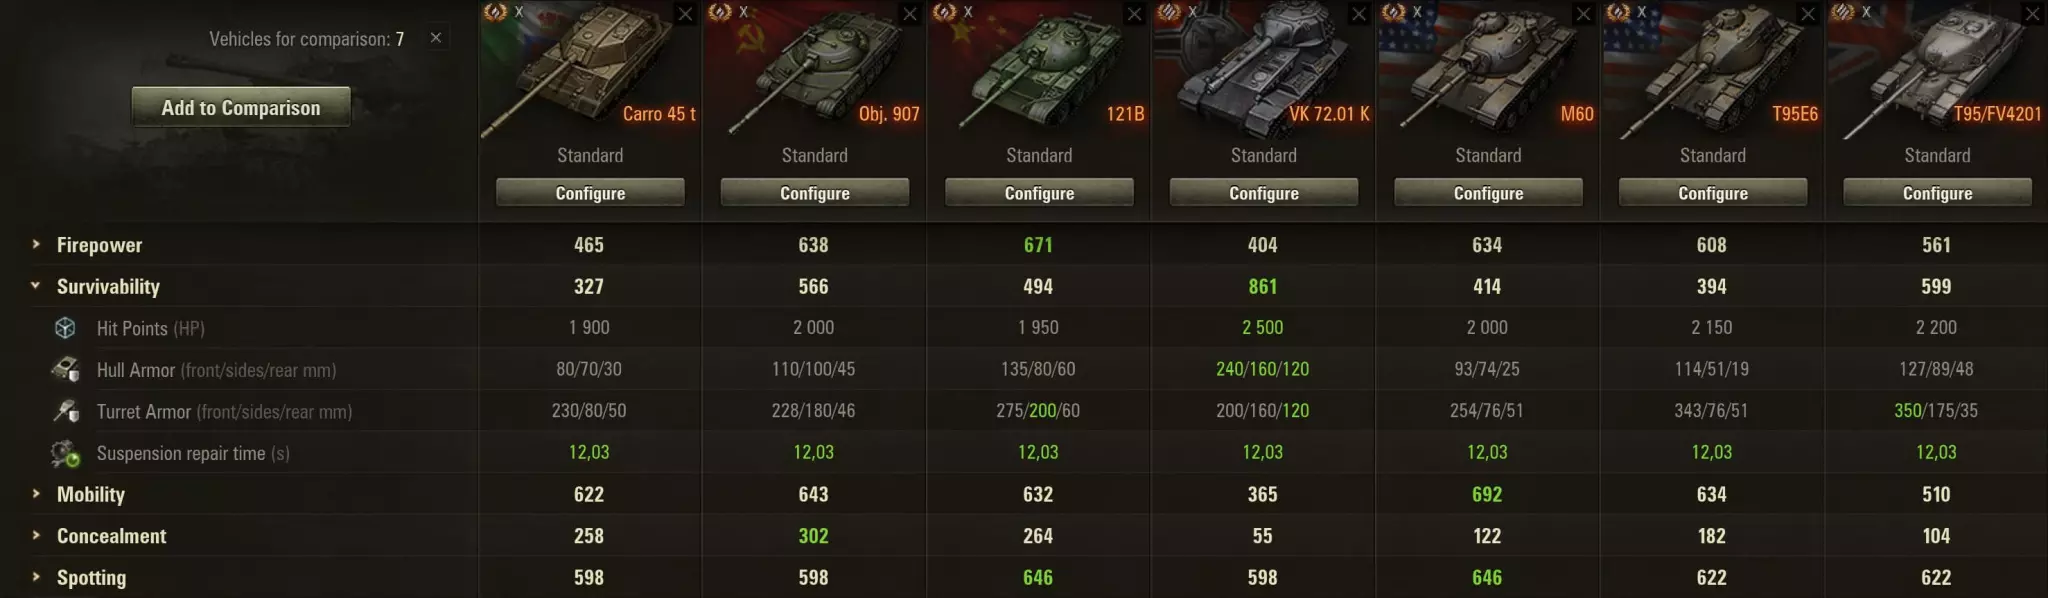
Think of the XT95E6 as a glass hull, steel hat. Hit points sit at 2,150, which is strong for Tier X mediums, but the hull plates are not where you tank.
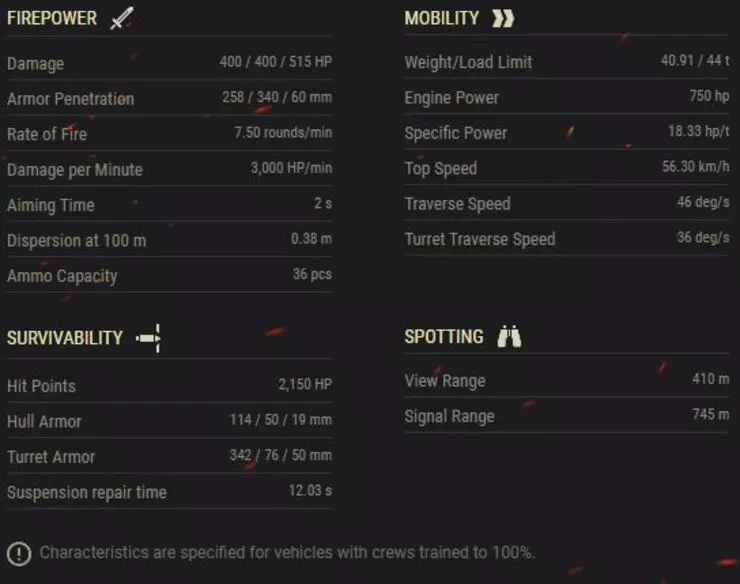
Nominal armor (front / sides / rear) reads 114 / 51 / 19 mm on the hull and 343 / 76 / 51 mm on the turret. Paper values on the turret ring and cupola do not tell the whole story — players will dig for the weak spots, especially the commander’s cupola, so you still need movement and ridge play.
| Parameter | Value |
|---|---|
| Hit points | 2,150 |
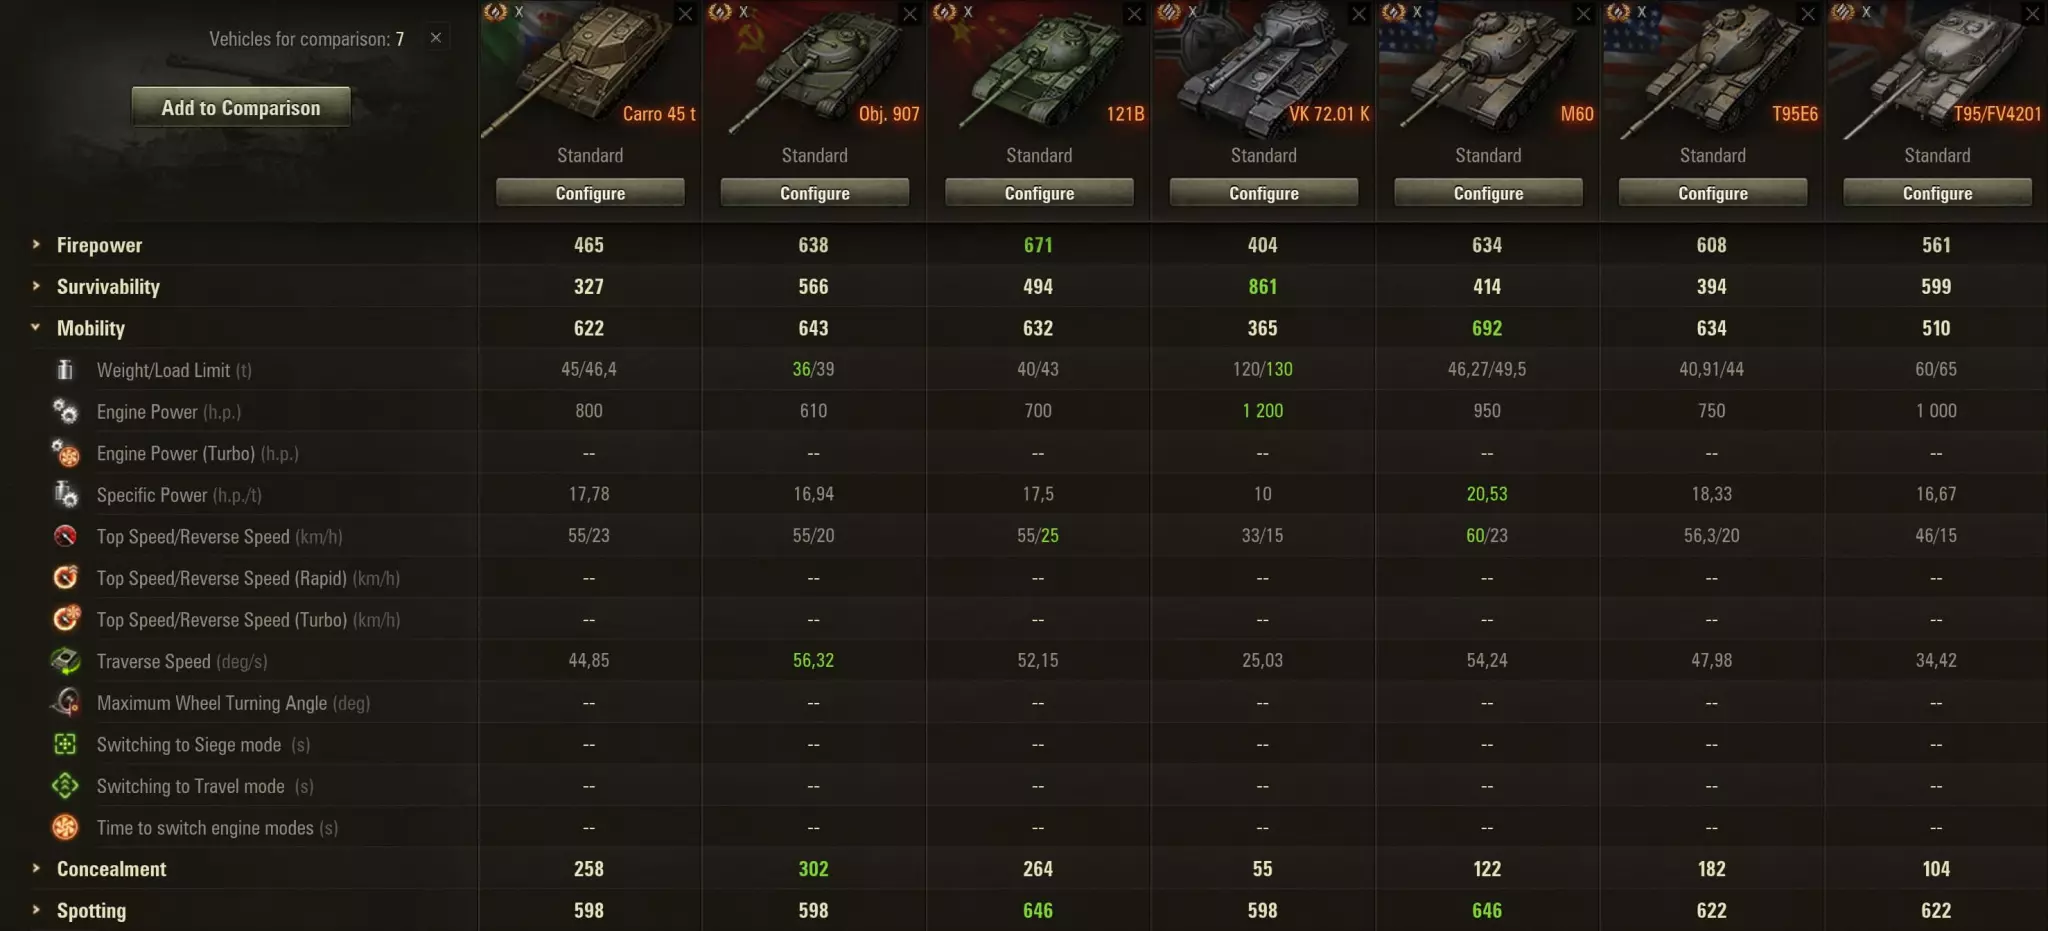
| Top speed / reverse | 56 / 20 km/h |
| Engine power | 750 hp |
| Weight | 40,914 kg |
| Power-to-weight | ≈ 18.3 hp/t |
| Hull traverse | 46°/s |
| Turret traverse | 36°/s |
| View range | 410 m |
| Signal range | 745 m |
Firepower
The 120 mm Gun T123E6 is the reason you tolerate the hull. Average damage rolls land at 400 with AP and HEAT shells and 515 with HE — penetration averages sit at 258 / 340 / 60 mm respectively.
Rate of fire is 7.5 rounds/min with a 2.0 s aim time and 0.38 m base dispersion at 100 m. That math pushes theoretical AP DPM to about 3,000, which is Tier X medium territory at the top end.
Gun depression hits 9° over the front — enough to work rolling ridges without feeling like a Soviet hovertank. Keep that angle in mind when you peek; it is your free damage when the red team overcommits.
| Shell | Avg. damage | Avg. penetration |
|---|---|---|
| AP | 400 | 258 mm |
| HEAT | 400 | 340 mm |
| HE | 515 | 60 mm |

Survivability
The lower plate and sides are not friends. Treat the hull like a liability: if you are not using terrain, you are donating HP. The mantlet and turret front can eat careless shots, but the cupola remains a priority target for anyone who knows the model — wiggle, change distance, and break their aim instead of parking.
When you must trade, present turret, not cheeks, and fall back before they dial in HE or premium into the roof line. You are not a hull-down immortal; you are buying time for the gun to churn.
Mobility and vision
56 km/h forward and a 46°/s hull traverse keep the XT95E6 from one flank window to the next without feeling sluggish. You can flex when your heavies anchor, punish crossfires, and reset when arty angles get gross.
Base view range is 410 m. Vents, food, and crew skills push that higher — helpful on open maps where controlling bushes wins games.

Equipment
Default progression players run Rammer + Vertical Stabilizer + Improved Ventilation. You are doubling down on gun handling and DPM because the tank already wants to out-shoot people before they solve your armor puzzle.
| Slot | Module | Why it fits |
|---|---|---|
| 1 |
Gun Rammer |
More shells per minute — the XT95E6 already starts high. |
| 2 |
Vertical Stabilizer |
Tighter bloom while moving — you spend a lot of time peeking and juking. |
| 3 |
Improved Ventilation |
Small bump to gun, vision, and mobility stats across the board. |
Crew skills
You only get four seats, and the commander is also the radioman. Prioritize repairs and camo on everyone, then stack gun handling on the gunner, smoothness on the driver, and safety on the loader.
| Role | 1 | 2 | 3 | 4 | 5 |
|---|---|---|---|---|---|
| Commander | Sixth Sense | Repairs | Brothers in Arms | Camouflage | Eagle Eye |
| Gunner | Repairs | Snap Shot | Brothers in Arms | Camouflage | Firefighting |
| Driver | Repairs | Smooth Ride | Brothers in Arms | Camouflage | Firefighting |
| Loader | Repairs | Safe Stowage | Brothers in Arms | Camouflage | Firefighting |
Consumables
Large kits plus Case of Cola line up with the tryhard setup: you want the passive repair and med bonuses online all match, and the food buff scales every crew skill.
| Slot | Consumable | What it does |
|---|---|---|
| 1 |
Large Repair Kit |
Effect: Full module repair plus +10% passive repair speed for the whole battle. Cooldown: 90 s. Price: 20,000 credits (charged if used). |
| 2 |
Large First Aid Kit |
Effect: Heals the whole crew, trims stun, and adds injury resistance for the entire fight. Cooldown: 90 s. Price: 20,000 credits (charged if used). |
| 3 |
Case of Cola |
Effect: +10% to every crew skill until the battle ends (consumed each match). Price: 20,000 credits per battle. |
Need a roster-friendly path through Global Map grinds? Order structured help from Boost Hub and keep your account in trusted hands.
Browse Global Map services →Playstyle and verdict
The XT95E6 rewards mid-line positioning. You want enough range that cupola snipes are harder, but close enough that your DPM matters. Avoid pure brawls — the hull melts when someone gets flat angles.
Use mobility to flank distracted targets, but watch arty and crossfires; you are not thick enough to ignore splashes. When you must hug a heavy, play peek-a-boom from turret cover: show the mantlet, fire, drop before they adjust. Your gun depression supports that loop — just do not try to out-trade true super-heavies at knifefight range.
If you cannot hide the full silhouette, keep moving — odd angles buy ricochets and make the cupola harder to hold. Never offer a flat side or rear; even mid-tier guns will cash checks you cannot afford.
Verdict: The XT95E6 is a specialist reward for players who like high tempo gunnery and can manage weakspots. It will not forgive lazy positioning, but it pays off when you let the 120 mm do the talking.